
Gardeners are always looking for easier, cleaner, and more reliable ways to plant bulbs. One surprisingly effective technique uses something most people already have at home: empty toilet paper rolls.
Below is how the method works, which bulbs are best suited for it, and how to get the best possible results.
How the Toilet Paper Roll Method Works
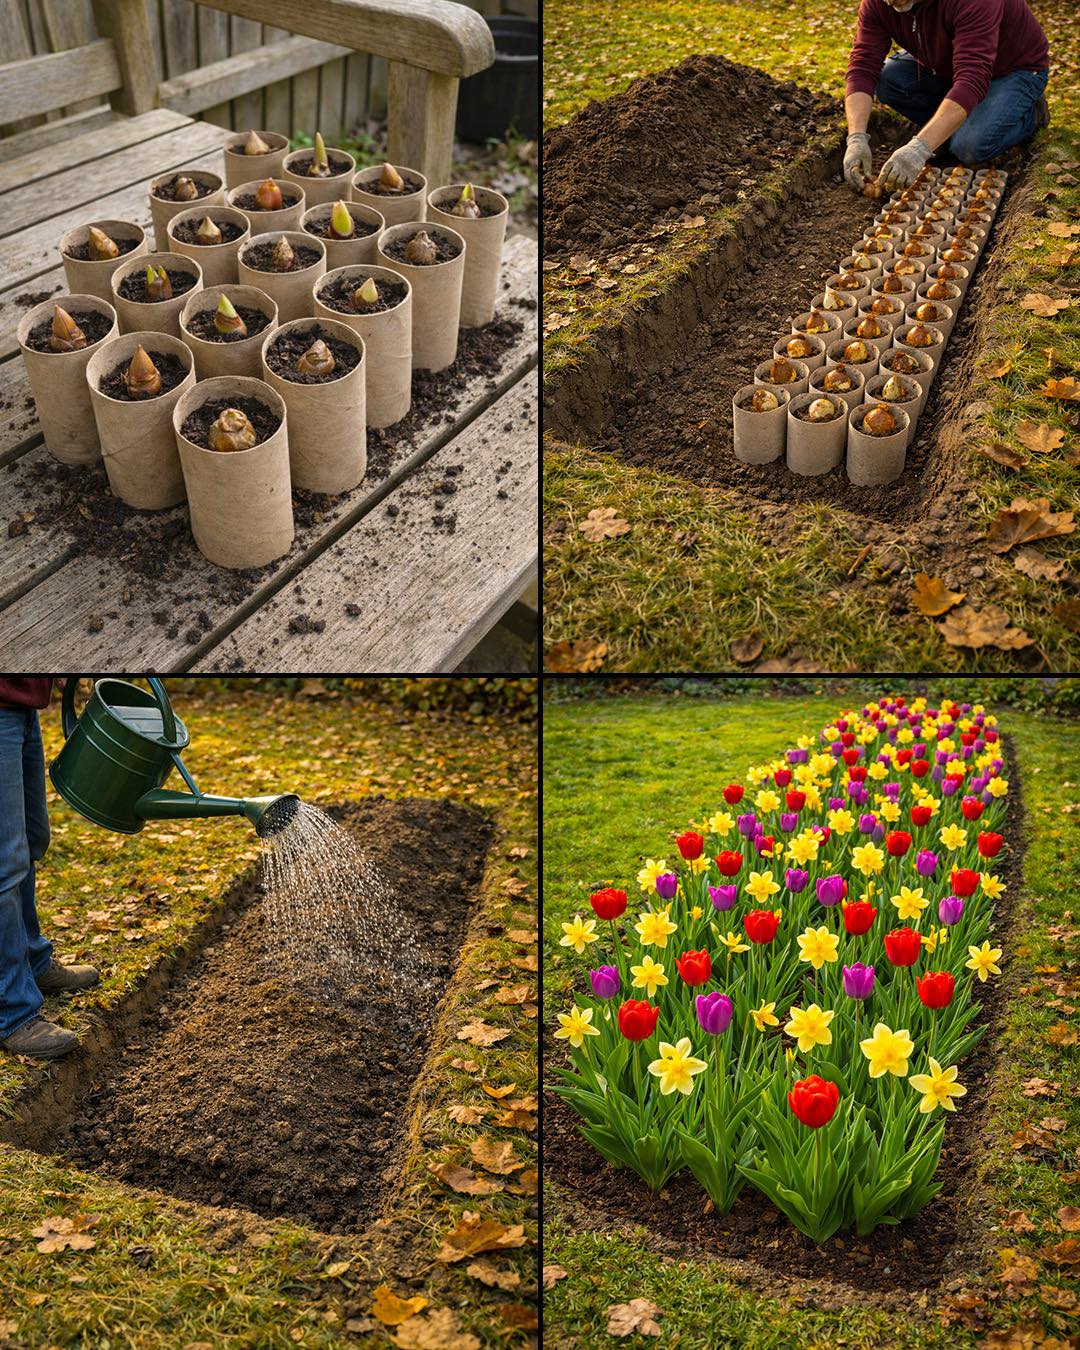
Instead of placing bulbs directly into the soil one by one, each bulb is first planted into an empty toilet paper roll filled with soil. These rolls are then placed side-by-side in a shallow trench and covered with soil.
The cardboard acts as a temporary container that:
Holds soil around the bulb
Keeps spacing consistent
Protects young roots
Slowly decomposes in the ground
By spring, the roll has softened or broken down completely, allowing roots to spread freely into the surrounding soil.
Step-by-Step Overview
Collect clean, dry toilet paper rolls.
Fill each roll with loose garden soil or potting mix.
Place one bulb in each roll, pointy side up.
Lightly cover the bulb with soil inside the roll.
Dig a trench 10–15 cm deep (depending on bulb size).
Place the rolls upright in rows inside the trench.
Backfill with soil and water thoroughly.
Most Common Bulbs That Work Well With This Method
This technique works best for medium to large spring-flowering bulbs:
Very suitable:
Tulips
Daffodils (Narcissus)
Hyacinths
Crocuses
Alliums (ornamental onions)
Irises (bulb varieties)
Snowdrops
Grape hyacinths (Muscari)
Also suitable:
Lilies
Fritillaria
Scilla
Anemones (tuber types)
Avoid very small or delicate bulbs unless using thinner soil and shallow trenches.
toilet paper roll bulb planting trench
Advantages of This Planting Method
1. Perfect spacing
Each bulb is naturally separated, preventing overcrowding and competition.
2. Faster root establishment
Soil around the bulb stays loose and moist, encouraging early root growth.
3. Less transplant shock
The bulb is never disturbed after placement.
