
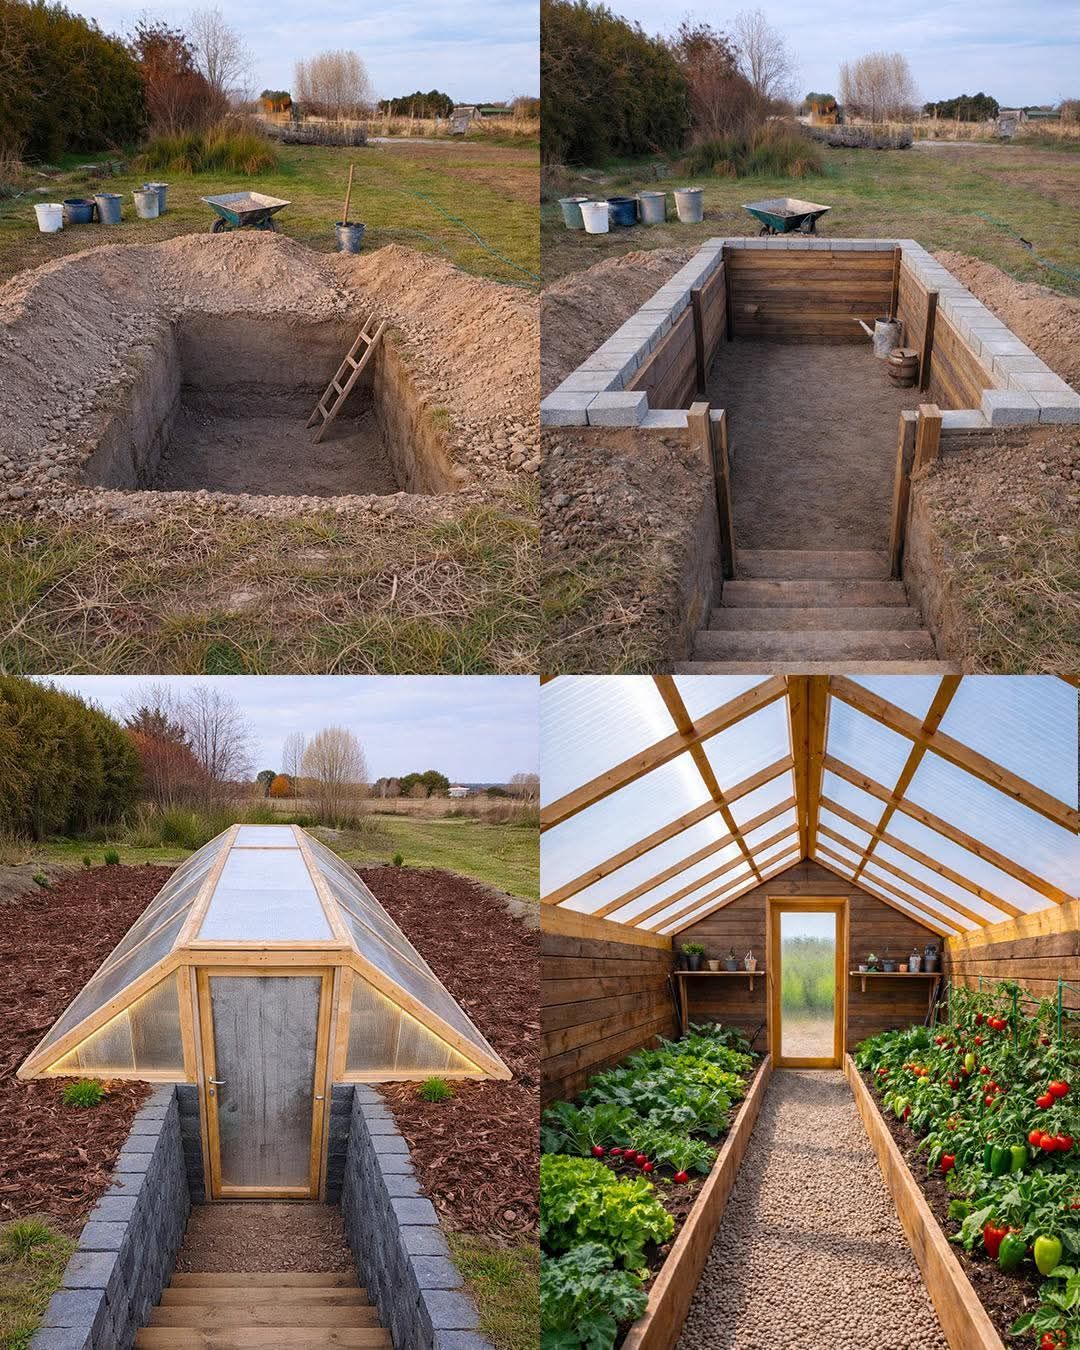
⛏️ Step 3: Dig the Pit
-
Excavate to desired depth
-
Keep walls slightly angled to prevent collapse
-
Create a drainage trench or gravel layer at the bottom
⚠️ Safety tip: If soil is sandy or unstable, reinforce walls before entering.
🧱 Step 4: Build the Walls
Options:
-
Rammed earth
-
Concrete blocks
-
Bricks
-
Stabilized earth bags
Insulate the north wall if you’re in a cold climate.
☀️ Step 5: Install the Roof
The roof is the only exposed part.
Materials:
-
UV-resistant greenhouse plastic (budget-friendly)
-
Polycarbonate panels (longer-lasting)
The roof should:
-
Be angled toward the sun
-
Be tightly sealed
-
Include ventilation windows
🌬️ Step 6: Add Ventilation
Even underground, overheating can happen.
Include:
-
Roof vents
-
Side vents
-
Optional small solar fan
Airflow is essential for plant health.
🌊 Step 7: Drainage & Floor
Add:
-
Gravel base layer
-
French drain system
-
Slight slope to remove excess water
Standing water is the biggest walipini problem.
🌿 What Can You Grow?
Depending on climate:
-
🥬 Leafy greens
-
🥕 Root vegetables
-
🌶️ Peppers
-
🍅 Tomatoes
-
🌿 Herbs
-
🍓 Strawberries
In colder areas, it’s perfect for winter greens. In warmer climates, it helps reduce extreme heat stress.
⚖️ Pros & Cons
✅ Pros
-
Energy efficient
-
Year-round production
-
Protected from wind
❌ Cons
-
Initial digging labor
-
Drainage challenges
-
Requires good planning
💡 Extra Tips
-
Add thermal mass (water barrels, stones)
-
Use raised beds for better soil control
-
Install shade cloth for hot months
-
Monitor humidity carefully
If you’d like, tell me your climate (hot, cold, desert, coastal, etc.), and I can suggest a walipini design optimized specifically for your region.
